Lego Wall in a MakerSpace

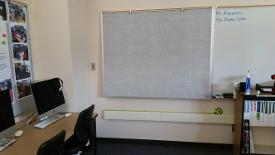
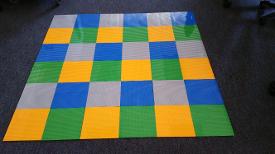
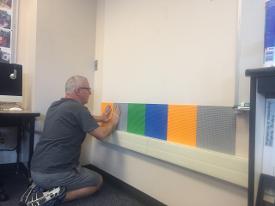
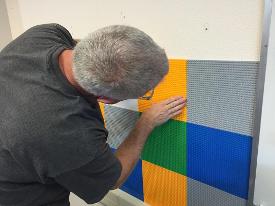
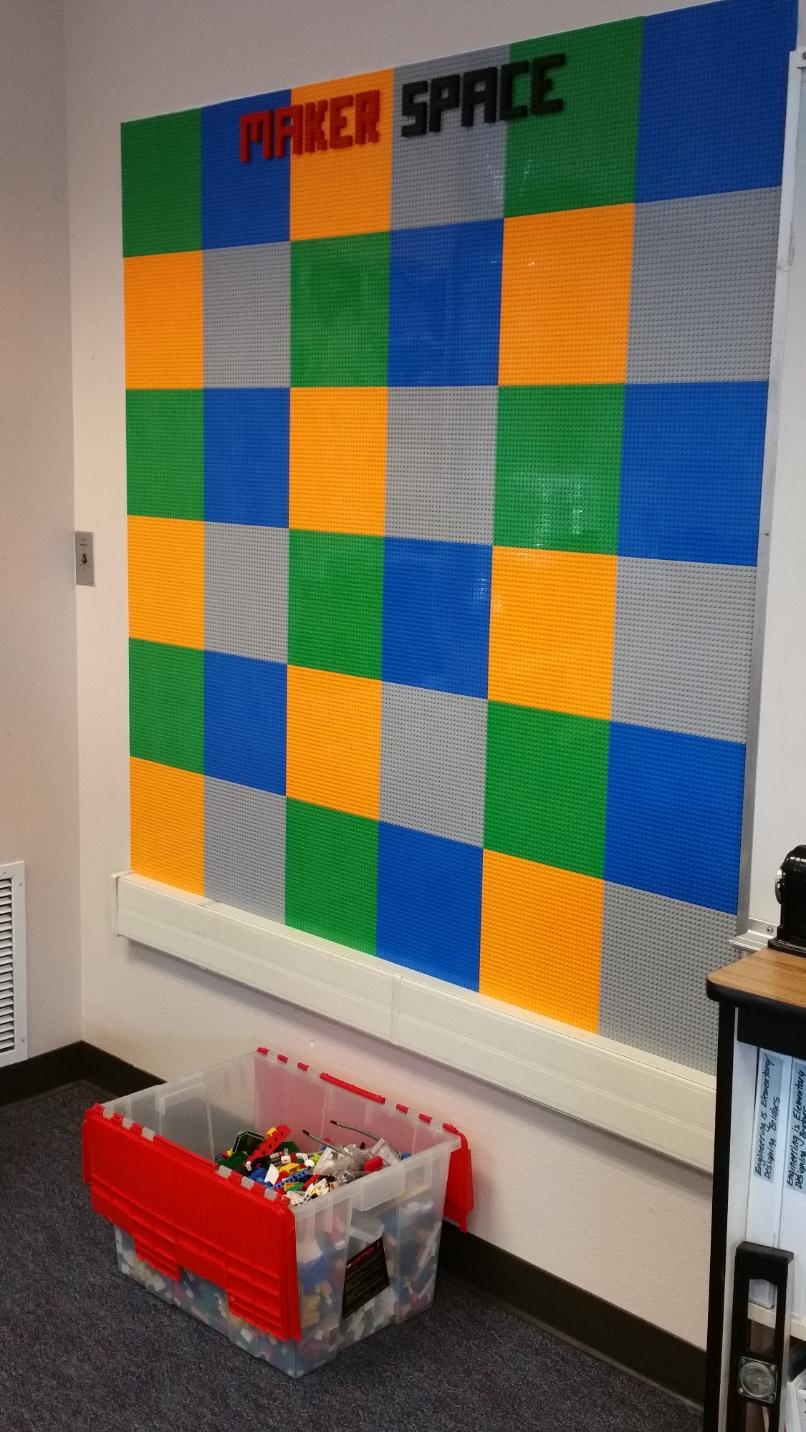
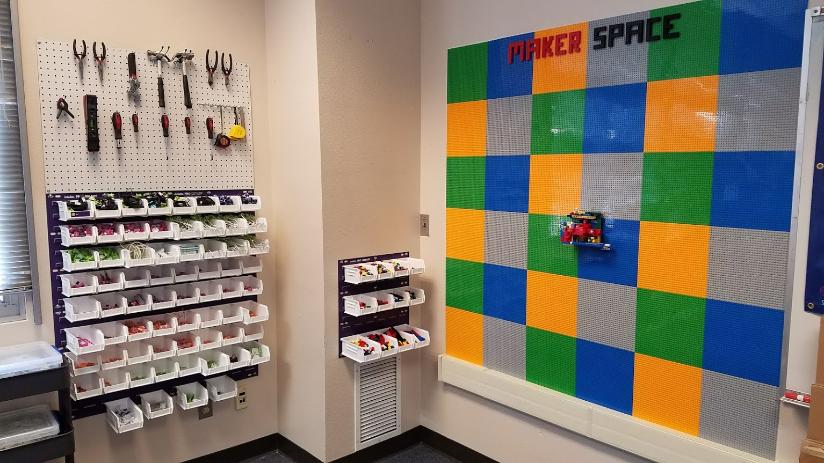
Here is an idea I first got from Chip and Joanna Gaines from their show Fixer Upper - The Barn House Episode. In one of the rooms, Joanna builds a lego wall in a child's bedroom using gray 10"x10" Lego plates. My daughter, Shawna McIntosh and Rodger Ashworth both thought this was a great idea for us to build a similar lego wall in the Washington Elementary STEAM MakerSpace (see slideshow).

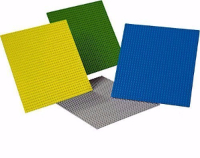
Shawna did some research and came up with a multicolor (pack of four) 10"x 10" from Build Pro Education Large Building Plates (pack of 4). We picked out a corner of the room and measured a 5'x5' space on the wall. She purchased 9 packs. Note - 3/5/17 I just went online at Amazon and couldn't find the pack listed above. I looked up several brands and came up with Strictly Briks. They have good reviews and I made the link so that it goes to all their products. They have several color 10" x 10" plate packs to choose from. Also note that the glue may show through on the lighter colored pieces. This occurred on the yellow piece in our build, so if that bothers you, pick a darker colored pack of 10" squares.

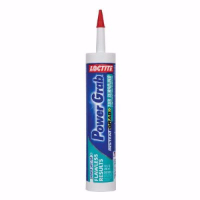
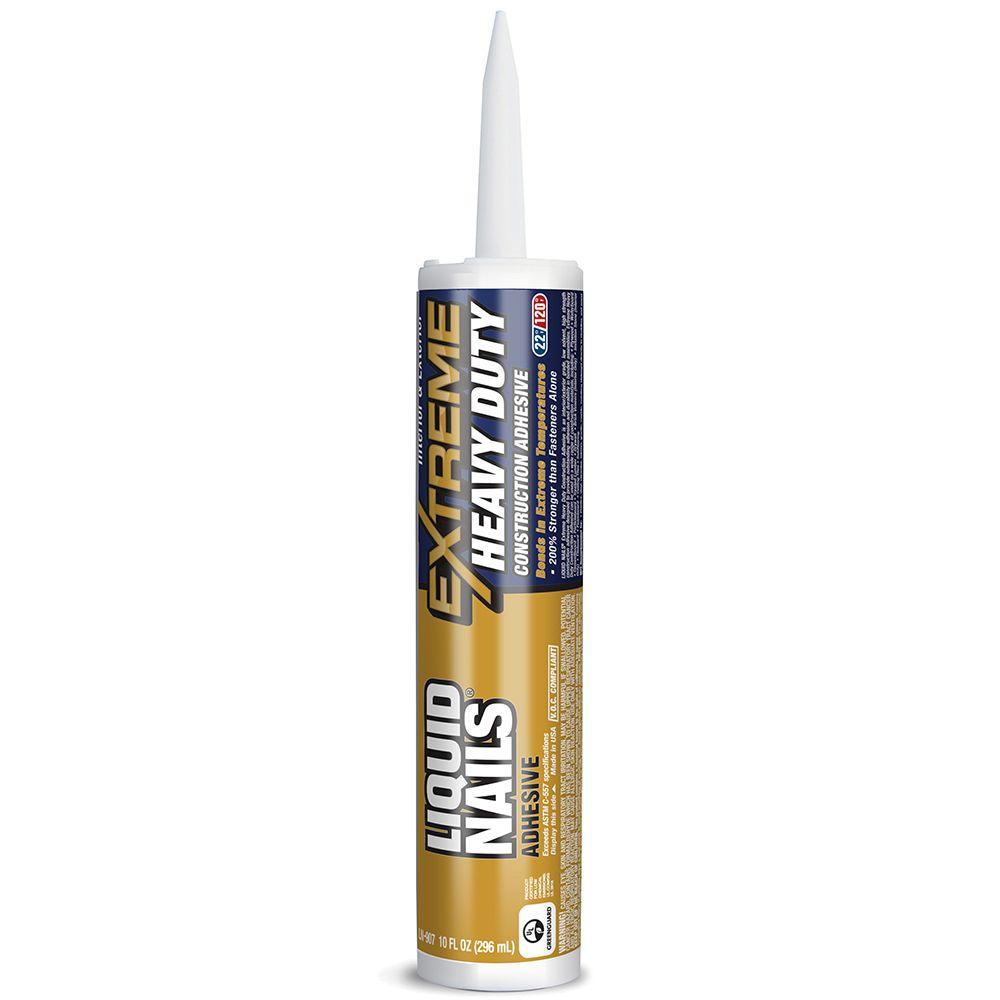
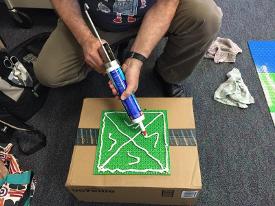
I went to Home Depot to find a good adhesive glue that would stick to plastic using a caulking gun. I read all the labels and found Loctite Power Grab 10 fl. oz. Tub Surround Adhesive. I paid about double of what I was planning to pay ($5.21) a tube but wanted our wall to have that heavy duty stick to the plastic and drywall. I estimated we'd need six tubes, one each for the six rows (and that ended just right with nothing left over). Note - My construction friends tell me you can us Heavy Duty Liquid Nails ($3.47 @ Home Depot), it is cheaper and works just as well.

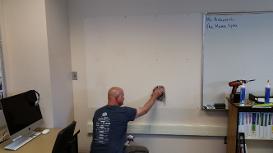
The following is a step-by-step of our little project complete with a video made by Shawna.

Preparation

  1. First, we had to take down this gray bulletin board. What made this particular project so easy was that we used the straight edge of the whiteboard on the right side and the straight edge of the electrical conduit located below the bulletin board. I did however use my level to determine that both lines were straight. 

  2. Mack Jackson, the Custodian and Rodger gently took down the bulletin board so that we could repurpose it somewhere on campus.

  3. Rodger then cleaned off the surface of the wall in preparation of the lego boards.

  4.  While this was going on, Shawna created a repeating color pattern of the four boards on the carpet so we could just pick them up, glue and stick.

As noted above, I would now save a little money and go with Heavy Duty Liquid Nails @ Home Depot ($3.47).

Install

  1. Rodger laid down the glue pattern and we were able to use one glue tube per six squares. Another reason I spent the extra bucks on the plastic glue is that it takes 10 minutes to set up. So, if you make a mistake you can shift and reposition the square. 

  2. I laid each square from bottom end and pressing to the top. Here's an important tip - press firmly across the square after you lay it in. At first, I used my fist to pound the square but found it would slightly shift with the glue. So, just even firm pressure as you go.

  3. I had it fairly simple in that I had the vertical edge of the whiteboard and horizontal edge of the electrical conduit to be my guide on the first row. If you are working on an open wall, I would highly recommend you use a long construction level to draw straight lines with a pencil.

  4. When I got to the fifth row, a few of the boards were about 1mm off. It was such a small fraction off that I was able to manipulate the boards to line up with no gaps between boards. 

  5. I brought an extra general adhesive caulking tube from home and used that to glue a line around the outside edges that weren't framed by the whiteboard or conduit. If you have an open space wall, you may want to consider making and gluing a simple wooden frame around the edges so that students cannot pick on the open end Lego boards and peel them off the wall.

  6. To finish off, Shawna made a cool Maker Space title with the Lego bricks. A total team effort!


Take a quick review look of the process in Shawna's video below.


Note to self - When I publish these posts, there's a good chance my 8 grandchildren may see and want this too. Stay busy my friends!

Update photo  - Little Bits Pro Library Bins with pegboard tools rack above. 
Note, I have also used an extra Little Bits Library Pro bin as organized storage for the Lego bricks for the Lego Wall.

Groupwerk, Inc. Copyright © 2018. All rights reserved.

No part of this publication may be reproduced, distributed or transmitted in any form or by any means, including photocopying, recording, or other electronic or mechanical methods, without the prior written permission of the publisher, except in the case of brief quotations embodied in critical reviews and certain other noncommercial uses permitted by copyright law. For permission requests, write to the publisher, addressed “Attention: Permissions Coordinator,” at the address below.

Groupwerk Publishing
615 Second Ave.
Broderick Building, Suite 340
Seattle, WA 98104